Step 1: Setup
To get up and running on the io.network first we'll need to create an MPC signer in order to receive, store and send tokenized assets.
- Register a Device (so you can sign transactions securely)
- Create a Vault (where your assets live)
- Generate API Keys (to interact programmatically)
1. Creating a Vault
Vault uses trustless MPC cryptography to secure your assets. When creating a new vault you'll determine who controls MPC key shares, how many shares they hold, and the threshold required to sign a transaction. More information can be found in our 'About MPC' section.
Register a Device
First, follow the device registration guide to link your mobile device to your workspace. After you've completed the mobile setup flow you'll see your device as an available signer when creating a new vault.
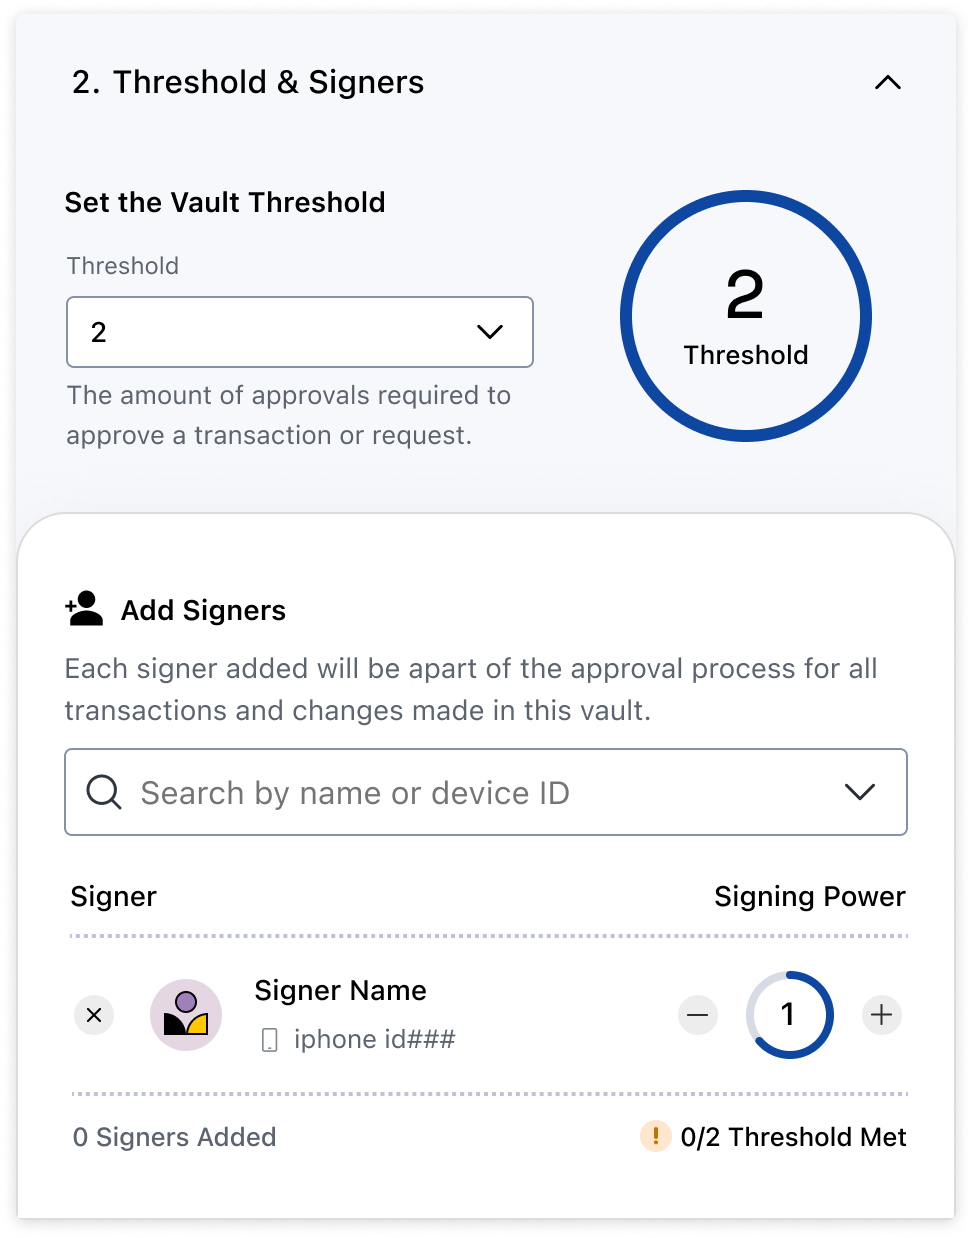
Create a Vault
Next click 'Create Vault', and configure your signing party by determining your threshold, the devices within the party, and each of their signing power.
Note: physical devices such as your Android or Iphone can be used as a signing device, but to automate this vault please follow step 4 and utilise a 'Virtual Signer'.
2. Whitelist your Vault
By default all vaults and their addresses are blocked on the io.network; attempting to send or receive and asset will instantly fail. This is to ensure that the io.network remains a compliant 'walled garden' and governed by a regulated principal member.
To onboard and whitelist your newly created vault, please get in touch with your principal member who will begin the onboarding process. You will be asked "which vault would you like to whitelist?", and answer that question with the vault you created in the previous step. If you're unsure of how to begin the onboarding process then reach out to our customer support.
3. Generate API Credentials
Now that you have a whitelisted vault, you need an API key to interact with it programmatically.
- Log in to the Io Vault Dashboard
- Go to Settings > API Keys
- Click Create API Key
Save your Client ID and Client Secret somewhere safe (you won’t see them again!)
Your API credentials will look like this:
Client ID: 16fc281f-b6ca-4e21-9bf0-53887253db85
Client Secret: Px7&nKFKx8vcjxeief256wX&...
4. Authenticate and Get an Access Token
Vault's API's implement the 0Auth specification; so now that you have your client ID and secret, you'll be able to use those values to obtain an access token.
const authResponse = await fetch('https://api.iofinnet.com/v1/auth/accessToken', {
  method: 'POST',
  headers: {
    'Content-Type': 'application/json',
    'Accept': 'application/json'
  },
  body: JSON.stringify({
    clientId: '<client_id>',
    clientSecret: '<client_secret>'
  })
});

const { accessToken } = await authResponse.json();
The access token returned from this request should be passed in the "Authorization" header later on when using our API endpoints.
headers: { 'Authorization': `Bearer ${accessToken}` }For more information on authentication head to our Authentication API reference.
Updated 12 months ago