

Webhooks in the dashboard
Add, edit, and monitor io.vault webhooks from the io.finnet dashboard
io.vault webhooks send an HTTPS POST to a URL you control when something happens in your organisation, such as a vault receiving tokens or a transaction becoming final. You can manage them in the io.finnet dashboard under Settings → Webhooks, in the io.vault section, without calling the API.
The same page has a separate io.sign section, with its own webhooks, signing secrets, and delivery logs. To manage io.sign webhooks, see Webhooks in the dashboard under io.sign.
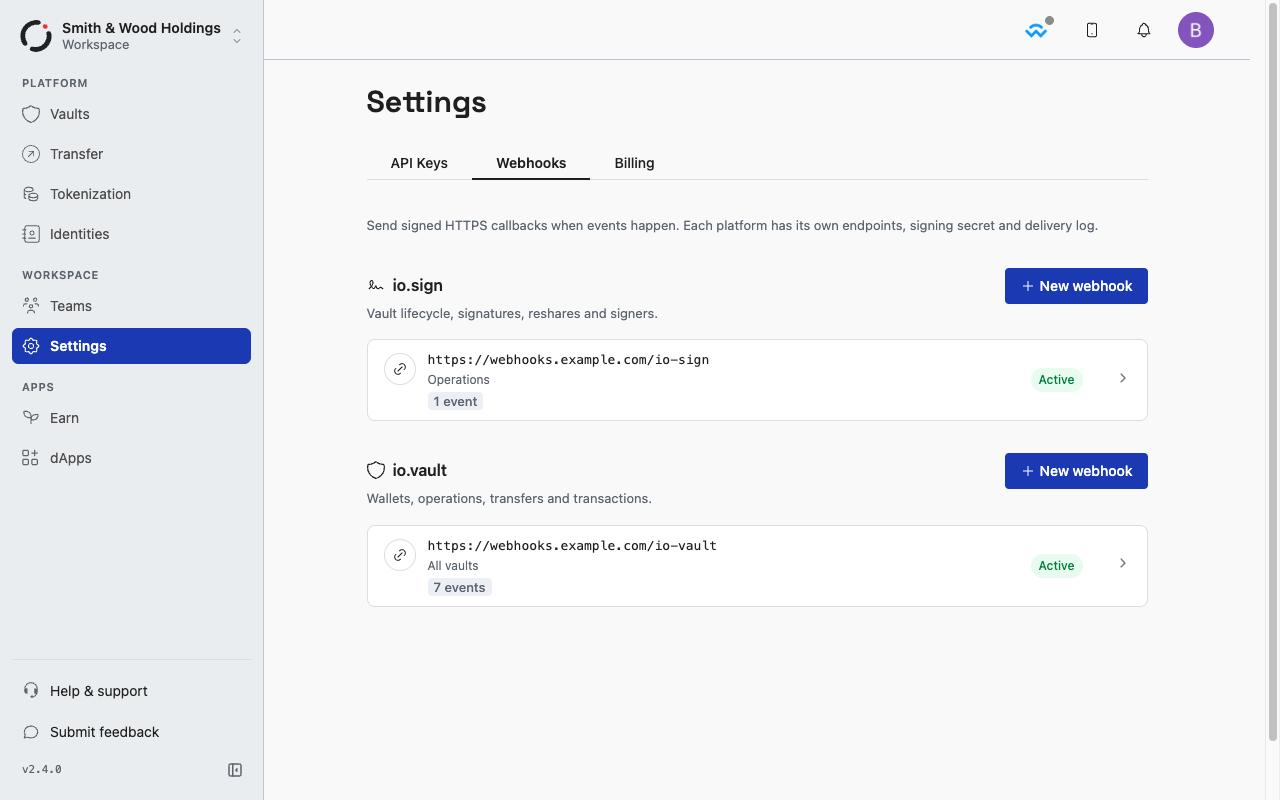
Who can use this page. You need the Admin or Admin Compliance role, access to vaults, and New Experience turned on in the dashboard. The io.vault section appears only when io.vault webhooks are available in your environment. To manage subscriptions through the API instead, see Webhooks.
Add a webhook
- Go to Settings → Webhooks.
- In the io.vault section, select New webhook.
- Enter the Endpoint URL. It must be an HTTPS URL on a public address, with no credentials in it, and no longer than 2,048 characters.
- Choose the Vault scope: All vaults, or one vault.
- Choose the events to send. Turn on All events to send every io.vault event, including event types we add later. Otherwise, tick the events to send. Tick a group to select every event in it.
- Select Create webhook.
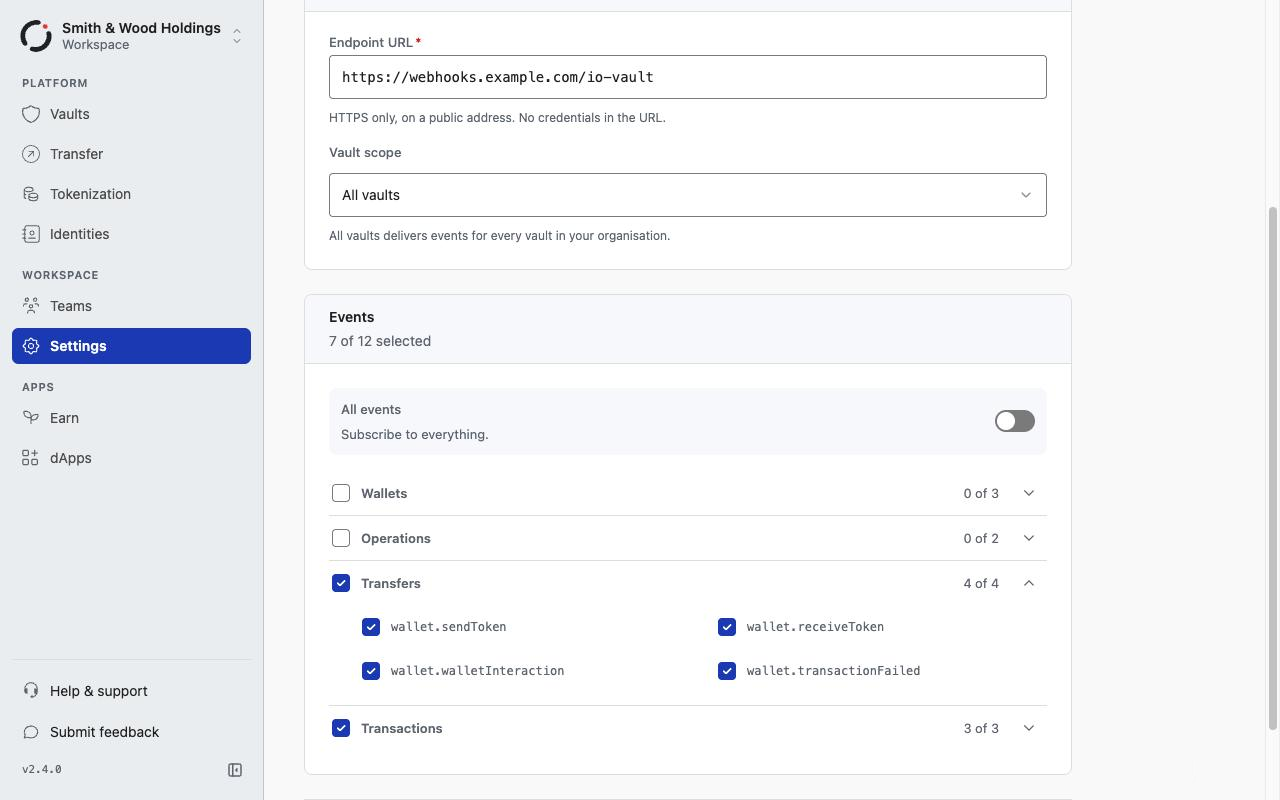
Events
| Group | Events |
|---|---|
| Wallets | wallet.created, wallet.monitored, wallet.unmonitored |
| Operations | operation.created, operation.updated |
| Transfers | wallet.sendToken, wallet.receiveToken, wallet.walletInteraction, wallet.transactionFailed |
| Transactions | transaction.reorged, transaction.confirmed, transaction.finalized |
The data fields for each event are in Webhook events.
Manage a webhook
Select a webhook in the list to open it. The webhook page shows its status, its details, its signing secret, and its deliveries.
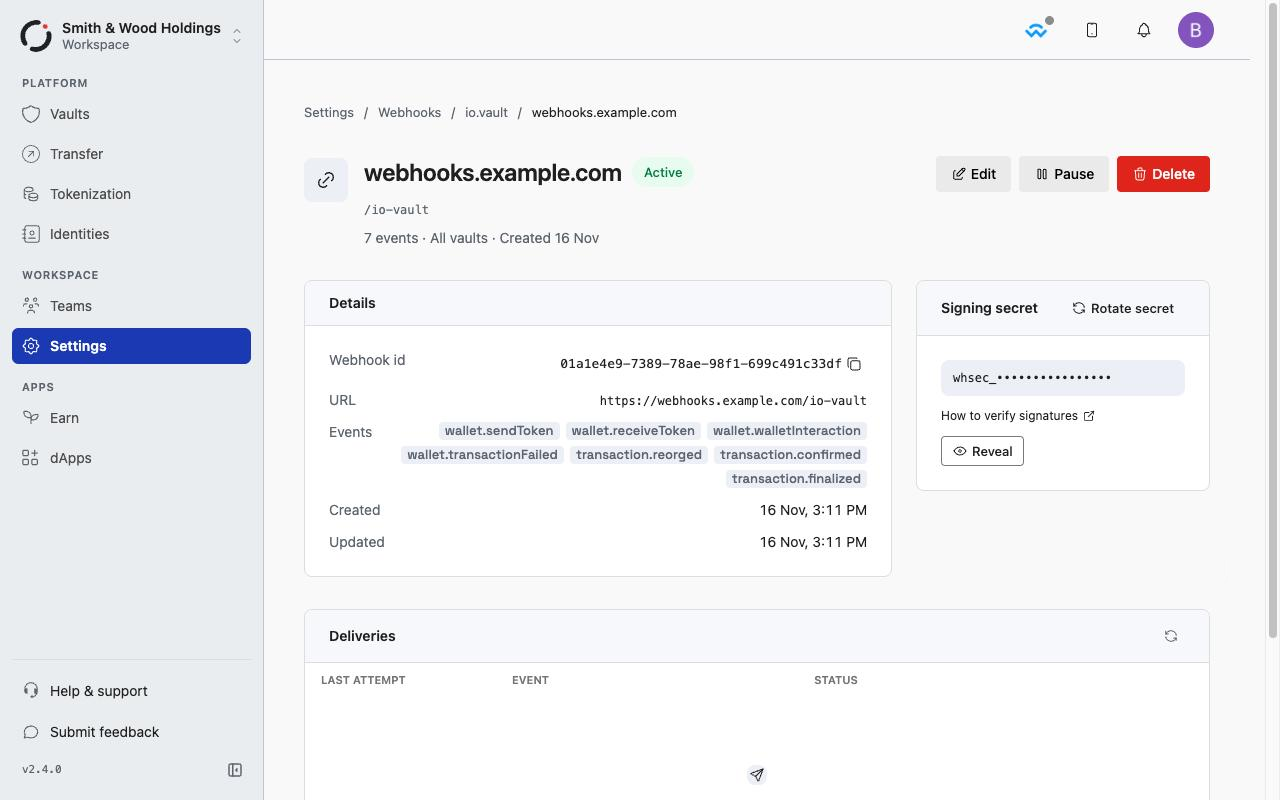
From the webhook page you can:
- Edit the URL, vault scope, or events. Saving doesn't change the signing secret.
- Pause the webhook to stop sending new events to it while keeping its settings. Select Resume to start sending again.
- Delete the webhook. Deleting can't be undone. Deliveries already queued are still sent.
If a webhook receives event types the dashboard doesn't list, for example because you created it through the API, editing keeps them unless you change its events or vault scope. Saving those changes removes them.
While a webhook is paused, we don't send events that happen in the meantime, and we don't send them later when you resume it. Deliveries that were already queued are still sent and retried, and a redelivery is still sent.
A webhook shows Disabled when someone in your organisation disabled it through the API. Select Enable to turn it back on. A failing endpoint never disables a webhook on its own.
The dashboard asks you to confirm your identity again before a sensitive change: creating a webhook, changing its URL, vault scope, or events, pausing or deleting it, and revealing or rotating its signing secret.
Signing secret
Each webhook has its own signing secret, which your server uses to check that a delivery came from io.finnet and wasn't changed on the way. Select Reveal to show the secret, which starts with whsec_, then Copy secret and store it in your server's secret store. If the panel says signing isn't enabled for this deployment, deliveries are unsigned. Your server can't confirm that an unsigned delivery came from io.finnet. Don't accept unsigned deliveries in production. Contact [email protected] to have signing enabled.
Select Rotate secret to issue a new secret. Until the time shown in Signs until, under Previous secret, deliveries are signed with both the new and the old secret, so you can deploy the new secret without dropping a delivery. The overlap is 24 hours by default, and you can't rotate again until it ends.
To check signatures on your server, see Verify the signature.
Deliveries
The Deliveries table lists the events sent to the webhook, with the status of each:
| Dashboard status | API status | Meaning |
|---|---|---|
| Queued | pending | The delivery is waiting to be sent. |
| Sending | in_flight | An attempt is in progress. |
| Delivered | succeeded | Your endpoint responded with a 2xx status. |
| Retrying | failed | An attempt failed, and we retry it automatically. |
| Failed | dead | Every attempt failed, and we stopped retrying. |
Select a delivery to see each attempt, the response your endpoint returned, and the exact payload we sent. Select Redeliver to send a Delivered, Retrying, or Failed delivery again as a new round of attempts, for example after your endpoint was down. Retrying and Failed deliveries also have Redeliver in their table row.
A redelivery keeps the same webhook-id, so a receiver that deduplicates on webhook-id skips it while it still holds that ID. If your receiver no longer holds the ID, for example because it's older than your retention period, it processes the event again. For deduplication, and for how many times we retry and how long we wait between attempts, see Respond, retries, and duplicates.
Updated 3 days ago